Security is one of the key factors in any kind of online application. And, most of the applications are exposing an API to get the data and perform the server-side operations.
To access this APIS client applications have multiple options one of them being in Bear Token Authentication. Where the client app sends the token in the header of each request to reach the secured endpoints/resources.
In one of my previous posts, I described how to use Basic Authentication to gain access to APIs. This time, we’ll take it a step further and talk about the bearer authentication mechanism, which is more secure than basic auth and has some extra options to make requests more secure.
Prerequisites To follow this tutorial
- Your Favorite IDE VSCode/Visual Studio/Rider
- .Net Core Version 2.1
- Postman Application/Client Application to Make Http Requests
Install dotnet core 2.1
We are going to use the dotnet core 2.1 version to implement the bearer or token-based authentication. So make sure you have a required version of the dotnet core.
To make sure you have .NET Core 2.1 installed, you can open a command window and run
Check .Net Core Version
dotnet --version

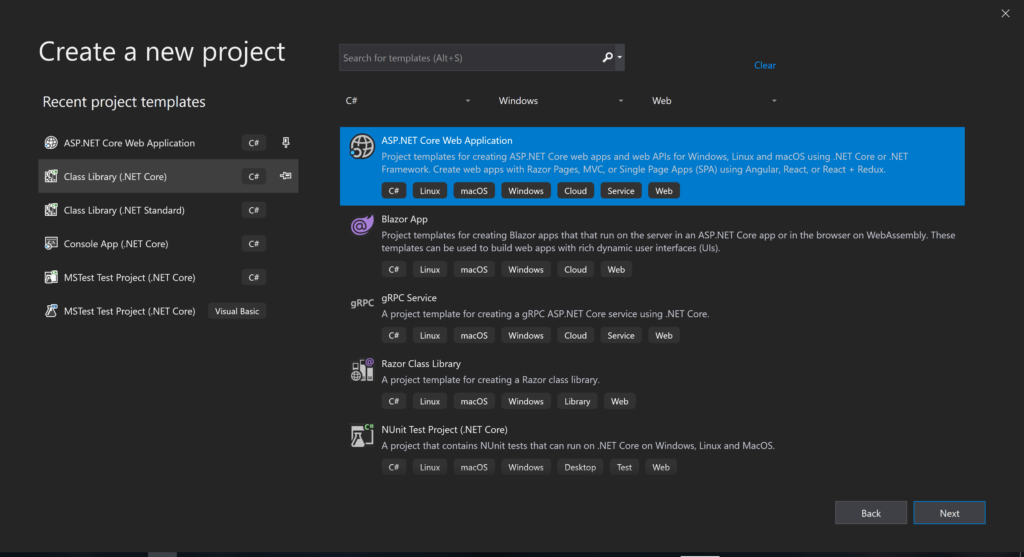
Create .Net Core WebAPI
- Ensure that you see 2.1 or higher in the output. If you don’t, you can install it from here.
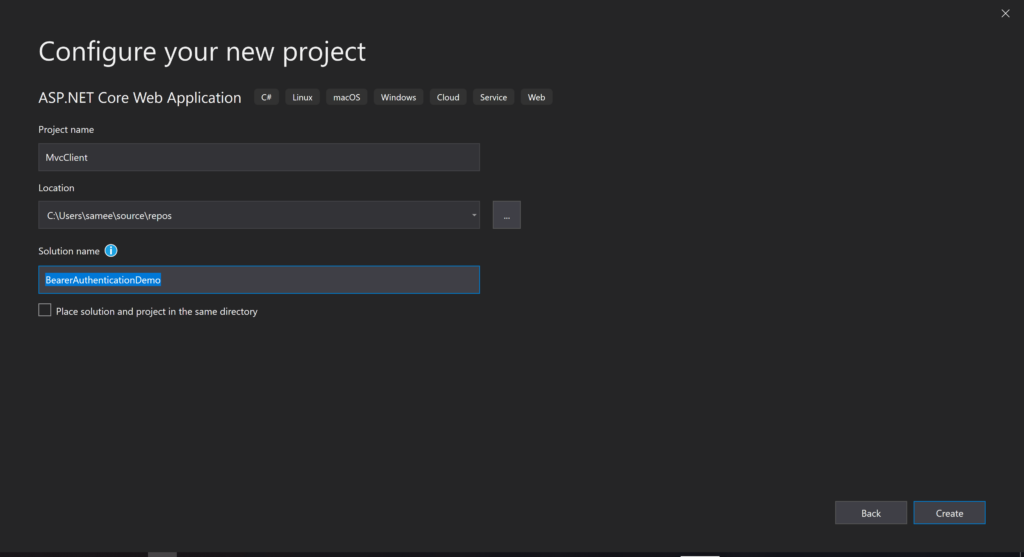
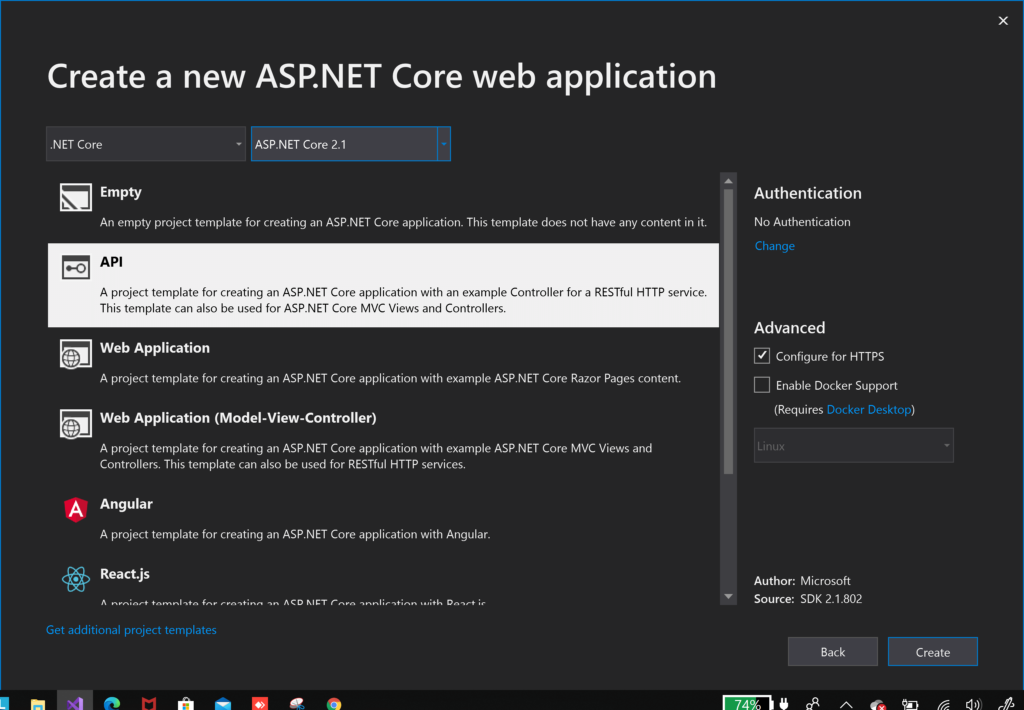
- Open visual studio and start creating our Mvc client project
- Select an API project with version 2.1 and create the project.
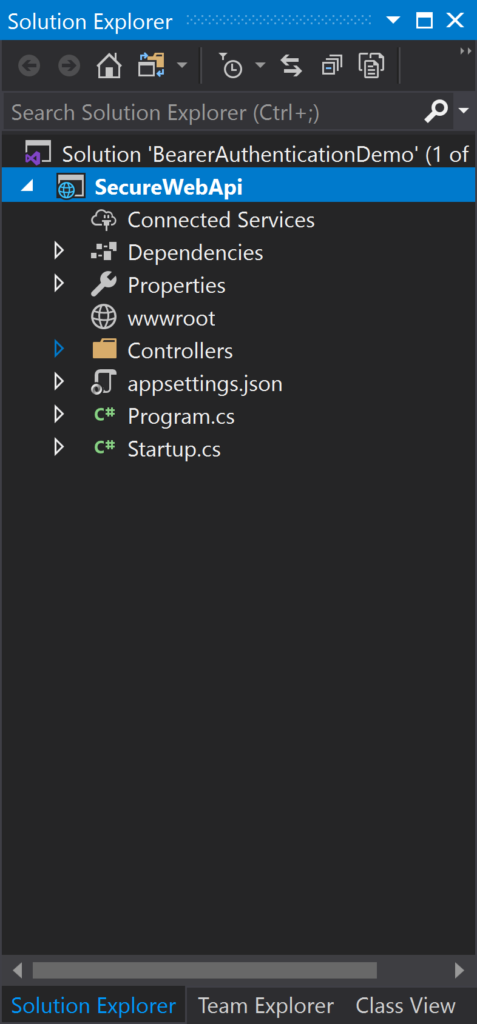
- Once the project template is created. The folder structure of the project should look like this.
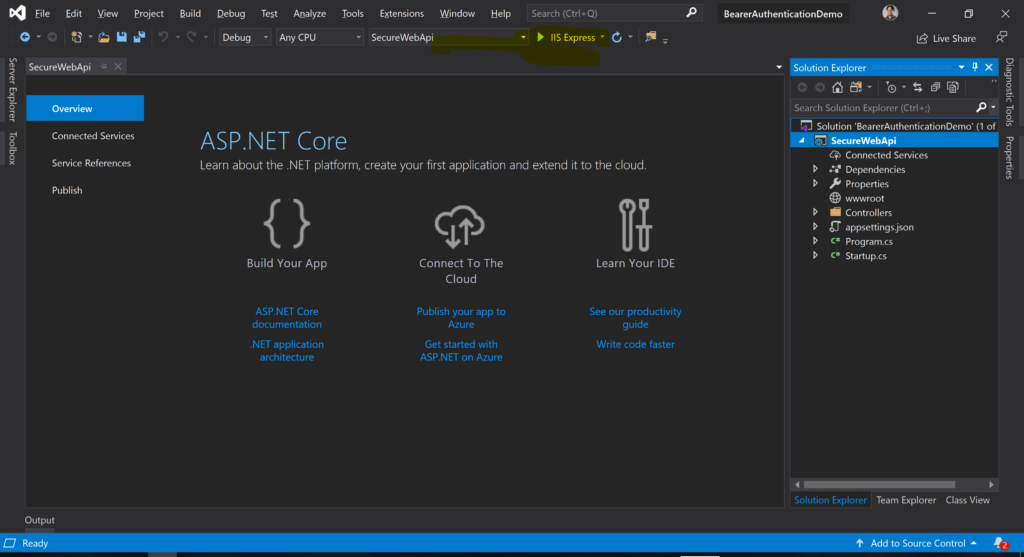
- Run the application by clicking on the highlighted area. (IIS Express)
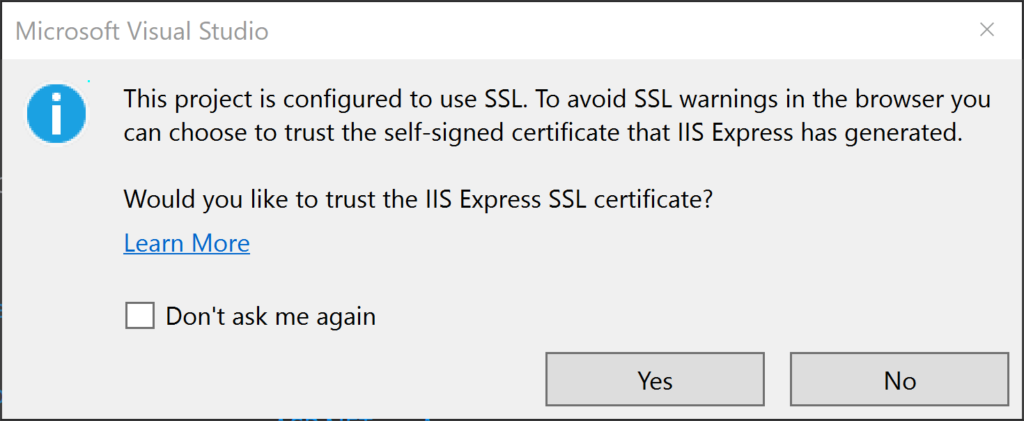
Once the application and set up properly. you can run it by just pressing F5 or Debut Option.

As you can see in the picture above. Anyone who knows the application’s URL is able to use the API. Because we didn’t introduce authentication of any kind.
Let’s try to secure this application by using OAuth 2.0. Introducing the token-based authentication mechanism for our client API.
What is the Identity server?
Identity Server is an open-source OpenID Connect and OAuth 2.0 framework. It can be used to make your application an authentication / single sign-on for the server. It can also issue access tokens for 3rd party clients. This document describes how you can integrate IdentityServer4 (version 2.0+) into your project.
You can read more about the identityserver document page.
http://docs.identityserver.io/en/stable/intro/big_picture.html
- Clients: Lists of clients who are registered with the identity server to generate the token by providing some credentials.
- For example, you can log in to website1, website2, and website3 using a social login provider like Google. So, all these websites are clients of Google.
- Users: The user is the person who wants to access the secured resource by providing the credentials.
- Resources: List of resources secure by Identity server. eg: WebAPI
- JWT Access Token: The access token is the base64 encoded string used by developers to make API requests on behalf of the user. It is the authorization of a specific application to access certain sections of the user’s data. the token must be kept secret throughout transfer and storage.
- eg:eyJhbGciOiJIUzI1NiIsInR5cCI6IkpXVCJ9.eyJzdWIiOiIxMjM0NTY3ODkwIiwibmFtZSI6IkpvaG4gRG9lIiwiaWF0IjoxNTE2MjM5MDIyfQ.SflKxwRJSMeKKF2QT4fwpMeJf36POk6yJV_adQssw5c
Configure Identityserver4 on the Asp.Net core project
I am going to add one more project called IdentityDemo to the solution which will be an identity server to provide the tokens to the clients.
Follow the same steps we did for our client project
- Select the Empty project template with .Net core version 2.1.
- The project structure should look like this.
Install the IdentityServer4 using the NuGet package
paket add IdentityServer4 --version 2.5.4
Or, Install using the Nuget package manager.

We’ll use middleware to configure IdentityServer4 in our startup.cs file. For demonstration purposes, we’ll run the Identity server on InMemory data. We need to give some fundamental details, such as Clients, Users, and Resources, in order to operate the identity server. All of this essential information is stored in the static class.
using IdentityServer4;
using IdentityServer4.Models;
using IdentityServer4.Test;
using System;
using System.Collections.Generic;
using System.Linq;
using System.Security.Claims;
using System.Threading.Tasks;
namespace IdentityDemo.Identity
{
    public static class InMemoryStore
    {
        public static IEnumerable<Client> Clients()
        {
            return new List<Client>()
            {
                new Client
                {
                 ClientId="8cd6f243-5350-41e7-a6f6-981bd6e2f337",
                 ClientName = "Mvc Client",
                 ClientSecrets = { new Secret("8cd6f243-5350-41e7-a6f6-981bd6e2f337".Sha256()) },
                 AllowedGrantTypes = GrantTypes.HybridAndClientCredentials,
                 AllowOfflineAccess = true,
                 RequireConsent = false,
                 RedirectUris =
                    {
                        "http://localhost:5002/signin-oidc"
                    },
                 PostLogoutRedirectUris =
                   {
                        "http://localhost:5002/signout-callback-oidc"
                   },
                 AllowedScopes =
                 {
                     IdentityServerConstants.StandardScopes.OpenId,
                     IdentityServerConstants.StandardScopes.Profile,
                 },
                }
            };
        }
        public static IEnumerable<TestUser> Users()
        {
            return new List<TestUser>
         {
             new TestUser
             {
                 SubjectId = "1",
                 Username = "dk",
                 Password = "dk@123",
                 Claims = new List<Claim>
                 {
                     new Claim("name", "Deependra Kushwah"),
                     new Claim("website", "https://beetechnical.com")
                 }
             }
         };
        }
        public static IEnumerable<IdentityResource> IdentityResources()
        {
            return new List<IdentityResource>
         {
             new IdentityResources.OpenId(),
             new IdentityResources.Profile()
         };
        }
    }
}
AddIdentityServer using ConfigureServices method in .Net core.
 public void ConfigureServices(IServiceCollection services)
        {
            services.AddMvc();
            services.AddIdentityServer()
                .AddDeveloperSigningCredential(filename: "idp.rsa")
                .AddInMemoryIdentityResources(InMemoryStore.IdentityResources())
                .AddInMemoryClients(InMemoryStore.Clients())
                .AddTestUsers(InMemoryStore.Users().ToList());
        }
Add identity server pipeline using the Configure method.
public void Configure(IApplicationBuilder app, IHostingEnvironment env)
        {
            if (env.IsDevelopment())
            {
                app.UseDeveloperExceptionPage();
            }
            app.UseIdentityServer();
            app.Run(async (context) =>
            {
                await context.Response.WriteAsync("Hello World!");
            });
        }
Now token generation is enabled on your identity server. Attempt to launch the application and navigate to the URL. This page will be set up for each token provider. This document describes the many options that a client application can use to request a token.
https://localhost:5001/.well-known/openid-configuration

It’s time to request the token to the identity server. I will use a postman to generate the token. We need to pass a few required parameters to generate the token.
Token endpoint URL
This endpoint you can find in the well-known configuration document.
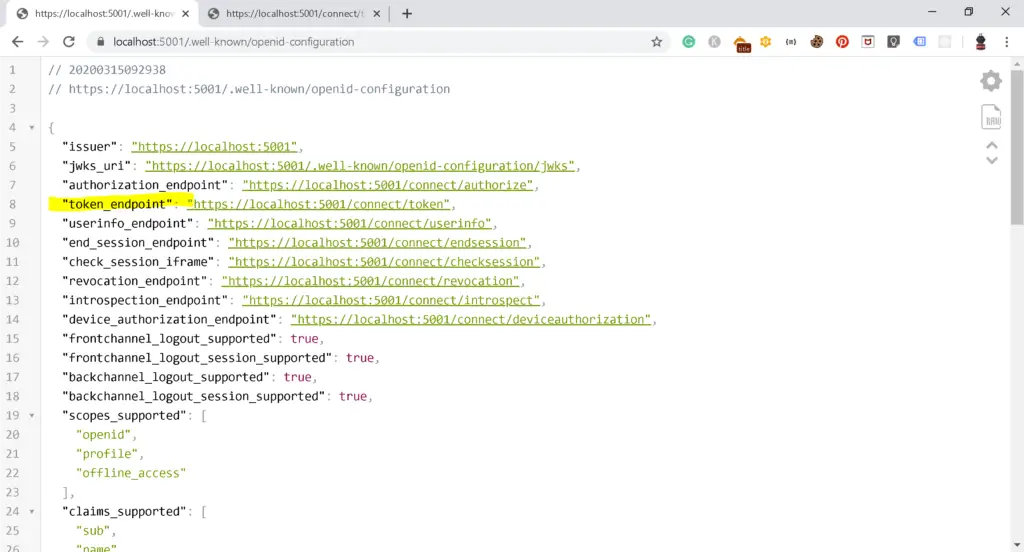
Create a new request in postman with the URL and post method.

Generate OAuth token
While registering a client with the identityserver you will get the client Id and secret. We need to pass these details as Basic auth to generate the token.
- Go to the authorization tab
- Select type as BasicAuth
- Client Id as username
- Client secret as the password
- In our case, ClientID and secret both are the same.

Now, navigate to the body tab and provide the following details.
- grant_type: Password, Refer document to get more information on grant_types.
- Username: One of the users from the TestUsers list which we provided to the identity server.
- Password: Password field for the selected user
- Scope: OpenID profile, What are the scopes that should be included in the generated token.
Read the identityserver document to get more details on identityserver scopes.

Just click on the Send button to make a request to the Identity Server and get the token.

Navigate to the client project and run the application. As of now, our client application is not secured, anyone can hit the URL and get data. In order to make our client application secure, We need to make some changes in a controller as well as in the startup.cs file of the client.
Download the NuGet package using the below command
package add IdentityServer3.Contrib.AccessTokenValidation --version 2.5.0
Or, using NuGet manager

Configure the identity server using startup.cs file.
services.AddAuthentication(
            IdentityServerAuthenticationDefaults.AuthenticationScheme)
                 .AddIdentityServerAuthentication(options =>
                 {
                     options.Authority = "https://localhost:5001";
                     options.RequireHttpsMetadata = false;
                     options.ApiName = "demo_web_api";
                 });
Use this piece of code in the ConfigureServices method.
app.UseAuthentication();
Configure the authentication pipeline using UseAuthentication() Middleware in the Configure method.
Complete startup.cs file.
using IdentityServer4.AccessTokenValidation;
using Microsoft.AspNetCore.Builder;
using Microsoft.AspNetCore.Hosting;
using Microsoft.AspNetCore.Mvc;
using Microsoft.Extensions.Configuration;
using Microsoft.Extensions.DependencyInjection;
namespace SecureWebApi
{
    public class Startup
    {
        public Startup(IConfiguration configuration)
        {
            Configuration = configuration;
        }
        public IConfiguration Configuration { get; }
        // This method gets called by the runtime. Use this method to add services to the container.
        public void ConfigureServices(IServiceCollection services)
        {
            services.AddAuthentication(
            IdentityServerAuthenticationDefaults.AuthenticationScheme)
                 .AddIdentityServerAuthentication(options =>
                 {
                     options.Authority = "https://localhost:5001";
                     options.RequireHttpsMetadata = false;
                     options.ApiName = "demo_web_api";
                 });
            services.AddMvc().SetCompatibilityVersion(CompatibilityVersion.Version_2_1);
        }
        // This method gets called by the runtime. Use this method to configure the HTTP request pipeline.
        public void Configure(IApplicationBuilder app, IHostingEnvironment env)
        {
            if (env.IsDevelopment())
            {
                app.UseDeveloperExceptionPage();
            }
            else
            {
                app.UseHsts();
            }
            app.UseHttpsRedirection();
            app.UseAuthentication();
            app.UseMvc();
        }
    }
}
Now put the [Authorize] attribute to the controller to not accept any unauthorized request.
using System.Collections.Generic;
using Microsoft.AspNetCore.Authorization;
using Microsoft.AspNetCore.Mvc;
namespace SecureWebApi.Controllers
{
    [Route("api/[controller]")]
    [ApiController]
    [Authorize]
    public class ValuesController : ControllerBase
    {
        // GET api/values
        [HttpGet]
        public ActionResult<IEnumerable<string>> Get()
        {
            return new string[] { "value1", "value2" };
        }
    }
}
Call Web API using postman without Access Token
Now open the postman app and try to hit the same URL. You should get the status code 401 UnAuthorized.
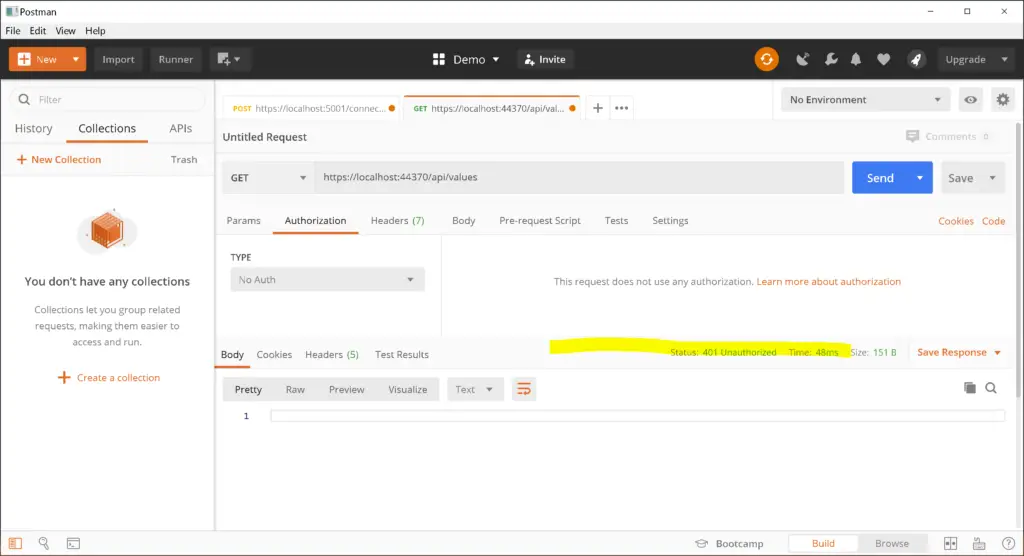
Now, lets use the generated token to call web API.

Invalid audience error message
Still, I am seeing the same status code 401 and not responding in the body section. you can get the error details by clicking on the response header.

The error message says the invalid audience. Because we have not asked the identity server to provide the scope of our client API with the name demo_web_api.

Register APIResource with IdentityServer and client.
So, first, we need to add this API name in the Identityserver configuration. Let’s go to our InMemoryStore class to include this API name in the APIResource list.

  using IdentityServer4;
using IdentityServer4.Models;
using IdentityServer4.Test;
using System;
using System.Collections.Generic;
using System.Linq;
using System.Security.Claims;
using System.Threading.Tasks;
namespace IdentityDemo.Identity
{
    public static class InMemoryStore
    {
        public static IEnumerable<Client> Clients()
        {
            return new List<Client>()
            {
                new Client
                {
                 ClientId="8cd6f243-5350-41e7-a6f6-981bd6e2f337",
                 ClientName = "Mvc Client",
                 ClientSecrets = { new Secret("8cd6f243-5350-41e7-a6f6-981bd6e2f337".Sha256()) },
                 AllowedGrantTypes = GrantTypes.ResourceOwnerPassword,
                 AllowOfflineAccess = true,
                 RequireConsent = false,
                 RedirectUris =
                    {
                        "http://localhost:5002/signin-oidc"
                    },
                 PostLogoutRedirectUris =
                   {
                        "http://localhost:5002/signout-callback-oidc"
                   },
                 AllowedScopes =
                 {
                     IdentityServerConstants.StandardScopes.OpenId,
                     IdentityServerConstants.StandardScopes.Profile,
                 },
                }
            };
        }
        public static IEnumerable<TestUser> Users()
        {
            return new List<TestUser>
         {
             new TestUser
             {
                 SubjectId = "1",
                 Username = "dk",
                 Password = "dk@123",
                 Claims = new List<Claim>
                 {
                     new Claim("name", "Deependra Kushwah"),
                     new Claim("website", "https://beetechnical.com")
                 }
             }
         };
        }
        public static IEnumerable<IdentityResource> IdentityResources()
        {
            return new List<IdentityResource>
         {
             new IdentityResources.OpenId(),
             new IdentityResources.Profile()
         };
        }
        public static IEnumerable<ApiResource> APIResources()
        {
            return new List<ApiResource>
         {
             new ApiResource("demo_web_api")
         };
        }
    }
}
Also, update the Startup.cs file of Identityserver to load the APIResources when it gets initialized.

The last step will be to assign this scope to the client. So, IdentityServer knows which client can ask for this scope(demo_web_api).
Calling WebApi using Access Token
Now you should be able to generate the access token which includes one more scope called demo_web_api.

As you can see in the above image, We have asked for one more scope called demo_web_api. So, the access token should contain this scope as well.
Lets try to call our client API again with the newly generated access token.

Conclusion
In this post, we have implemented the identityserver in web API dotnet core. Gone through step by step to configure the identity server on Web API. Also, how to secure the API using identityserver scopes.
Here you go with the list of topics we focused on.
- What is token-based authentication?
- How to implement using IdentityServer4 in .Net core.
- Configure the client to use identityserver for authentication.
- Generate access token using postman
- Calling a secure API using access token and postman
Feel free to post your comments or questions in the comment section below. Let’s let me know. If I missed something, the article would be glad to correct it.
What is Authorize attribute in Web API Controller?
Authorization in ASP.NET Core is controlled with AuthorizeAttribute and its various parameters. In its most basic form, applying the [Authorize] attribute to a controller, action, or Razor Page, limits access to that component authenticated users.
What are the required parameters for generating a JWT token?
grant_type: Password, Refer document to get more information on grant_types.
Username: One of the users from the TestUsers list which we provided to the identity server.
Password: Password field for the selected user
Scope: OpenID profile, What are the scopes that should be included in the generated token.



Comments are closed.