Hello everyone, I am here to guide you on how to download and install the Oracle database on Windows OS.
I have given the steps-by-steps process to make it more clear and understandable for you guys.
So let’s get started with some introduction about Oracle Database.
Introduction
Oracle Database is created by Oracle Corporation. The main features of Oracle Database are that it supports both SQL and PL/SQL.
The reason behind why I am using the Oracle Database other than using another software because of it’s PL/SQL feature. It is very easy to configure and use.
I will be showing you all the steps to configure your Oracle Database in your system so don’t worry my dear friend.
1. Welcome to the Oracle website
The first step we have to take is to visit the oracle official website. You can click here oracle_website_link to visit the website. The website looks like this when you visit it or there will be little bit changes on the website if you visit it.

2. Downloading Oracle Database from its website
The steps to download Oracle Database is shown below:
- Click the three-lined icon on the left side of the page.
- Under the on-premise infrastructure click on the Oracle Database.
- Choose 12c Release 1 – Enterprise Edition. You can download any of the products from the list but we are learning about 12c.
- The files for 12c is divided into two parts, you have to download both of them.
- You have to agree on the terms and conditions to download these files and when you have agreed on it you are prompted to log in page. If you haven’t created one of the Oracle accounts you have to create an Oracle account to download its products.
- Once you have created an account or logged in, your product will automatically start to download.
3. Installation
The show below is the steps to install Oracle Database:
1) Extract the two downloaded files from the folder.
2) Open the folder which is highlighted in the picture below.

3) You will see only one folder present in it when you open the above-shown folder. Open until you reach and open the components folder.
4) Copy all the folders present in the Components folder.

5) Open the below-highlighted folder and follow the given below path and paste all the copied folders

Path: databasestageComponents
6) Open the above-highlighted folder and under the database folder, open the setup file.

7) You will be asked that do you want to apply changes or something like that by the system and you have to press Yes and wait for some time.
4. Setup steps
Now let’s head towards the setup.
1) You can skip the first step if you don’t want to get information about the security issues by clicking next. If you want to get informed you can provide the details asked while installing.
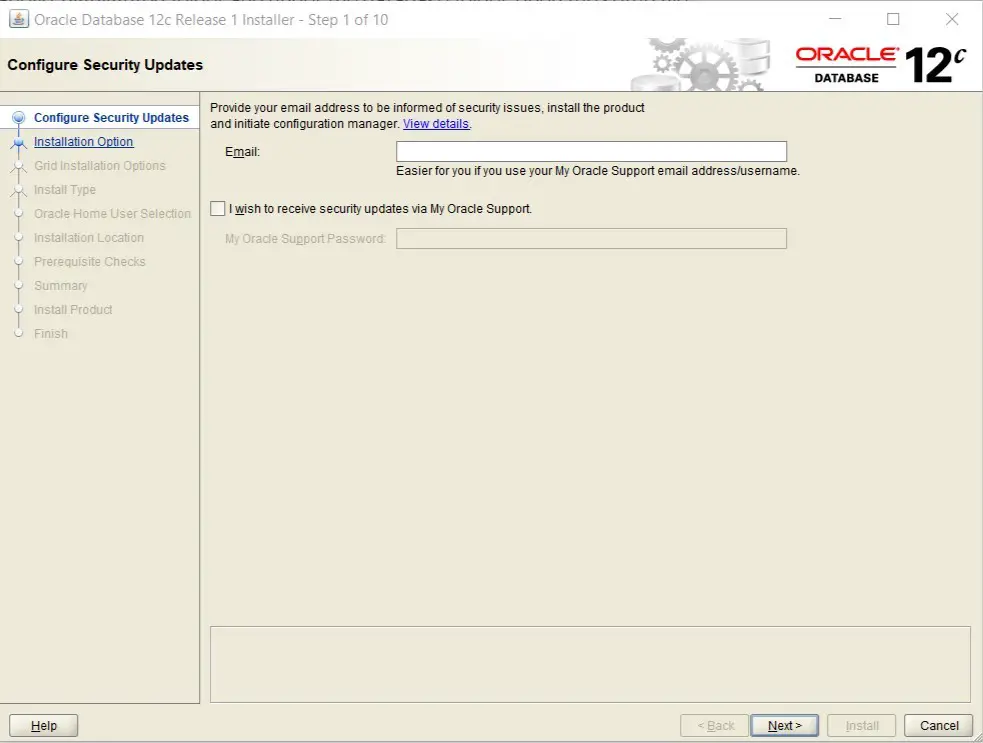
Click yes if alter box popped up when you have not filled up the required fields.
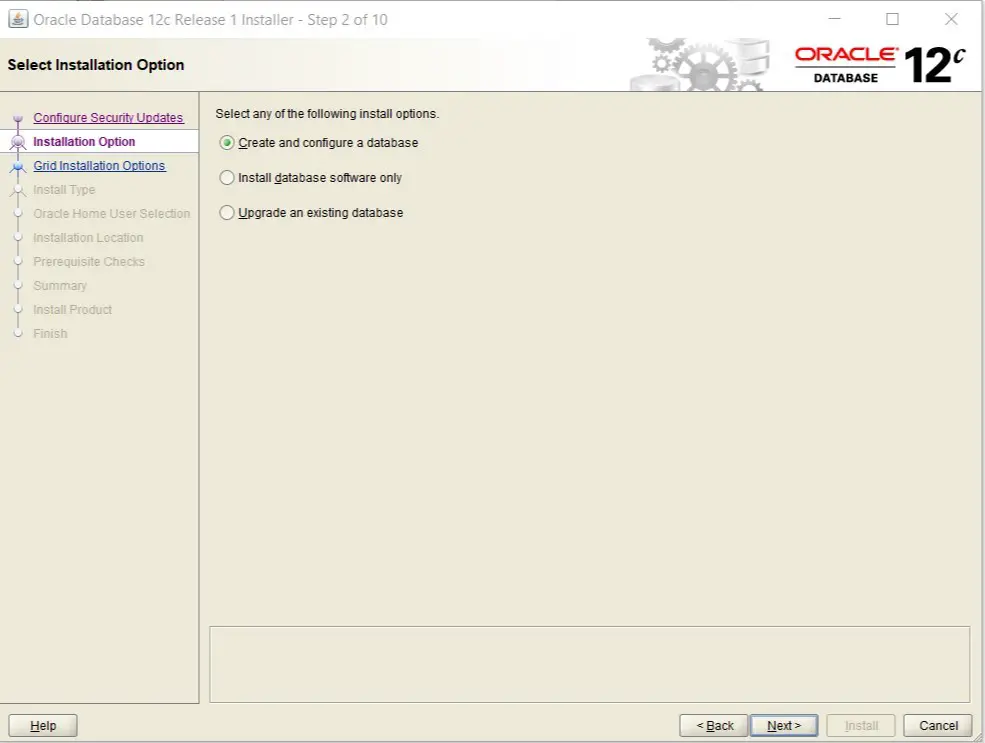
2) Choose the create and configure a database from the options and click next.
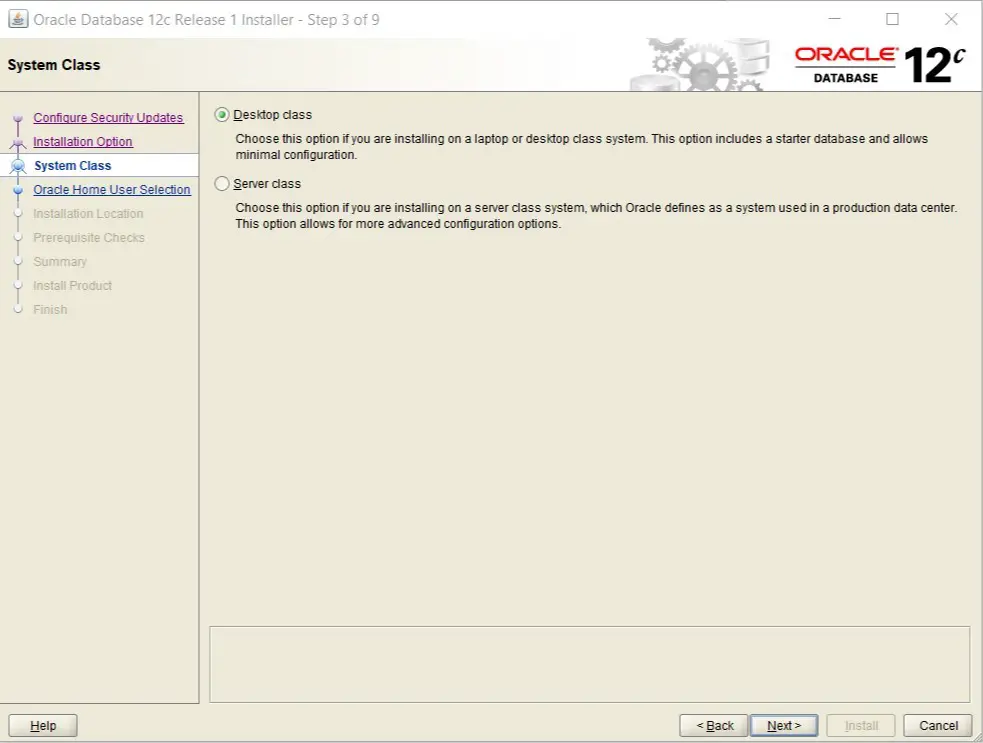
3) Choose the desktop-class for your laptop and PC and if you want to set the server then select server class. In this installation, I am choosing to go with a desktop-class. Click next to continue.
4) Create a new user or choose an existing user to install and configure Oracle Home. Remember your username and password. If your ready click next.
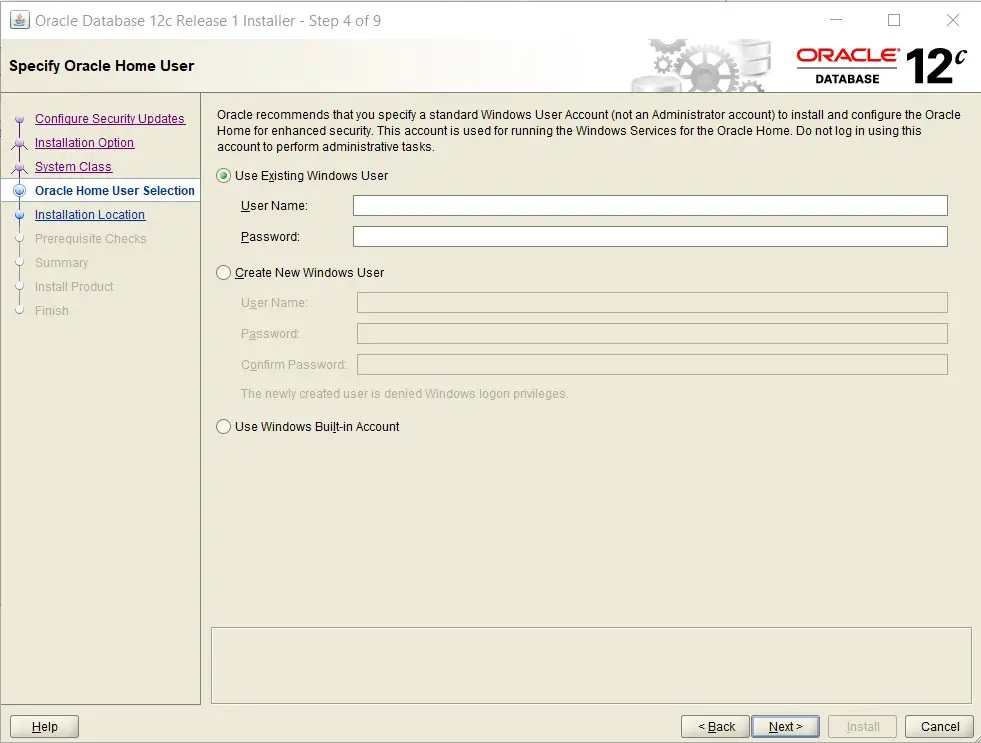
5) In the next step, we have to choose the location for the installation of the Oracle database. Provide database name and administrative password(remember the password). Click next to continue.
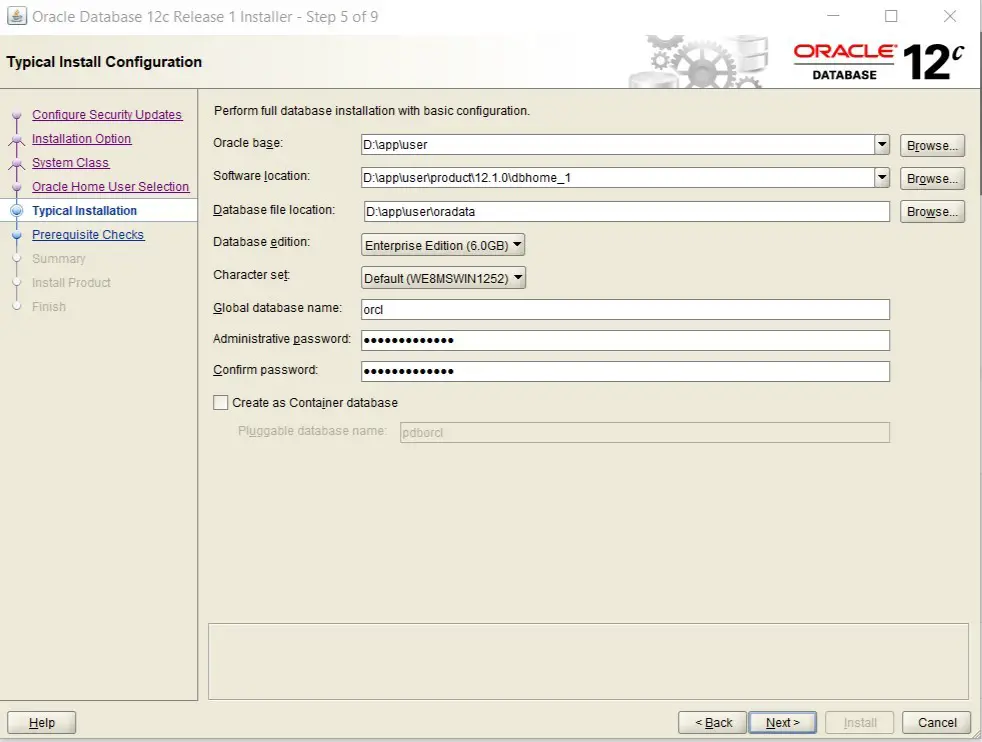
6) The prerequisite checks step will check all the files which are required to install and configure the product. Wait till the progress bar reaches 100%, then click next to continue.
7) In the next process all the products will be installed. Below is the given picture where all the products are successfully installed. Click OK to proceed.

8) Click on the install button. Now finally our product is being installed in our system.
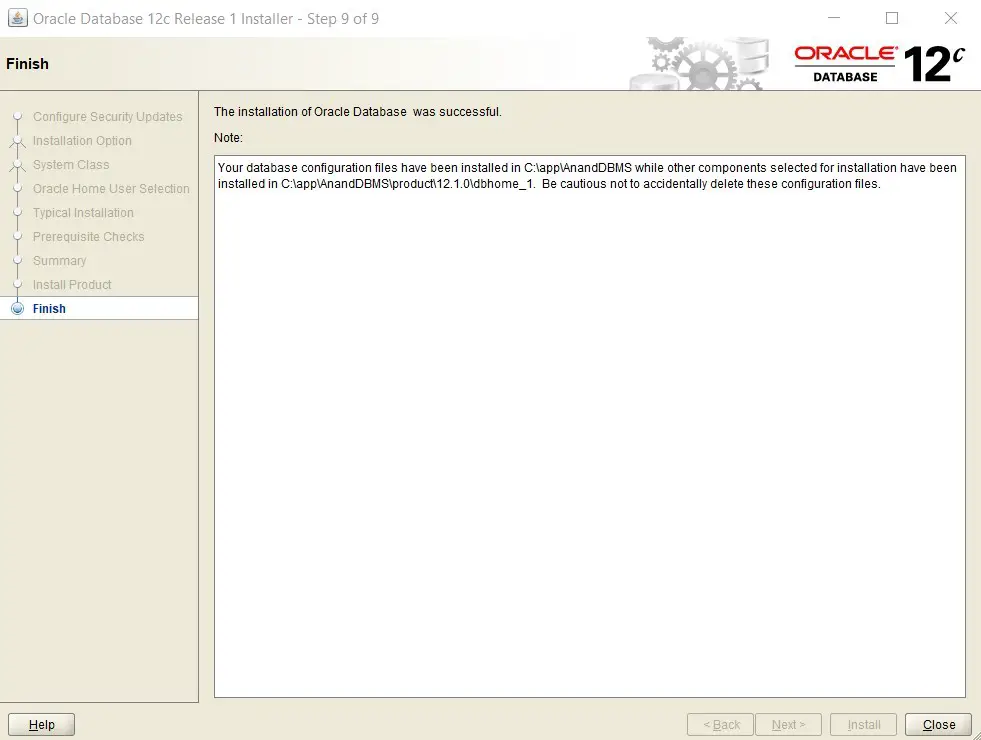
Congratulations Buddies for successfully installing Oracle database in your system. Just pad yourself on your back and keep the energy and curiosity high for studying.
Bye-bye take-care and if you have any questions to ask or any feedback to give, feel to comment on the comment section 🙂
