Microsoft Azure features a service known as Azure Blob storage where you can store huge amounts of unstructured data on Microsoft’s data storage cloud platform.
In this article, we will give a step-by-step tutorial on how to create blob storage in Azure using DotNet C#. Do follow the complete article till the end so that you won’t face any problems.
What is Microsoft Azure Storage?
Microsoft Azure is a Microsoft-managed cloud storage service where users can store data whatever they want according to pay-as-you-go charges. Azure storage consists of Blob storage, File Storage, and Queue storage.
We can store any types of data that includes text, images, files, etc using these services.
What is Blob storage in Azure?
Microsoft Azure provides a service known as Blob Storage, which is an object storage solution for the cloud where you can store a huge amount of unstructured data which need not be of any specific data model, it can be text, audio, images, and video which could be accessed from anywhere in the world where Internet connection is available.
You can store your data for a long time in Blob storage as acts as the persistent store.
Blob stands for Binary Large Object and each blob resides inside a container. With Blob storage you can choose to expose your data publicly to the world or to keep the data privately also.
Blob Service Hierarchy
There are 3 components of which a blob service is composed. These 3 components are as follows:-
- Storage Account: The storage account can be of any type such as a General Storage account (V1 or V2) or a Blob Storage Account.
- Container: A container generally organizes a set of blobs that is similar to any directory of a file system. A storage account can have an unlimited number of containers, and this container can store an unlimited number of blobs.
- Blob: A blob is actually a file of any size and type and in form of unstructured data, including images, audio, video, and files.
What are the types of Blob Storage?
The Blob storage of azure is further optimized into three different storage scenarios: These three types of blobs which are offered by Azure are as follows:-
- Block Blobs: Block blobs are considered the most ideal for storing discrete objects like images, log files, documents, text, or binary media files. In this option of block blob storage, unique IDs of individual blocks are created which is mainly used for the purpose of uploading big-size data. Data is stored in block series by block blobs and then clubbed into a single document file. The throughput and uploading process is achieved faster by block blobs. Users are allowed to store and upload a large amount of data.
- Append blobs: Append blobs are kind of similar to the Block blobs, but they are much more optimized in terms of increased efficiency especially for appending operations which makes the append blobs much more suitable in the case of storing logging data.
- Page Blobs: They are basically a compilation of pages. When there is a requirement of high reading and writing operations purposes Page blobs can be used as it will be very much efficient as they can store about 8 TB of data. This blob storage type option will be very useful for any kind of Azure virtual machines storage disk that can include the operating system disk too.
- The page blobs of Azure mainly have two-page blob categories which are as follows:-
- Standard:- It is used for virtual machines having an average amount of reading/write operations
- Premium:- It is used for virtual machines with intensive read/write operations, mostly recommended for the operating system disk.
- The page blobs of Azure mainly have two-page blob categories which are as follows:-
If you don’t specify the type of blob while creating a blob then the types of the blob are set to block blobs type by default.
What is Azure Blob Storage used for?
Blob Storage in Azure can be used for various needs that include storing unstructured data like audio, video, images, etc. The objects that can be stored in Blob do not need to have an extension.
Some use case scenarios of Azure blob storage are as follows
- As Azure Blob Storage can store unstructured data you can use Blob Storage for streaming audio and video files.
- You can store files and documents for distributed access
- You can use Blob storage for storing data during backup, archiving, restoring, and recovering.
- You can choose Blob Storage while uploading large files. Because Azure Blob storage will break the large files into smaller chunks and each of these chunks is uploaded individually and after these chunks are uploaded, they get merged into a single initial file.
Azure Blob Storage is very much optimized to store huge amounts of unstructured data. Unstructured data is that type of data that does not follow a particular data model or definition, unstructured data includes text or binary data. There are three types of resources that Blob storage offers. They are as follows:-
- The storage account
- A container in the storage account
- A blob in the container
The relationship between these resources is given in the following diagram:-
source:- docs.microsoft.com
We can use some of the following .NET classes to interact with these resources:
- BlobServiceClient: The BlobServiceClient class permits you to perform any kind of manipulation to Azure Storage resources and blob containers.
- BlobContainerClient: The BlobContainerClient class permits you to perform any kind of manipulation to Azure Storage containers and their blobs.
- BlobClient: The BlobClient class permits you to perform any kind of manipulation of Azure Storage blobs.
Step By Step guide for connecting Blob Storage in Azure with C#
By now, we have got an idea regarding blob storage of azure, now let us understand how you can Connect to blob storage using C#. The following steps will make you understand the full process.
Starting with the creation of the Azure Account
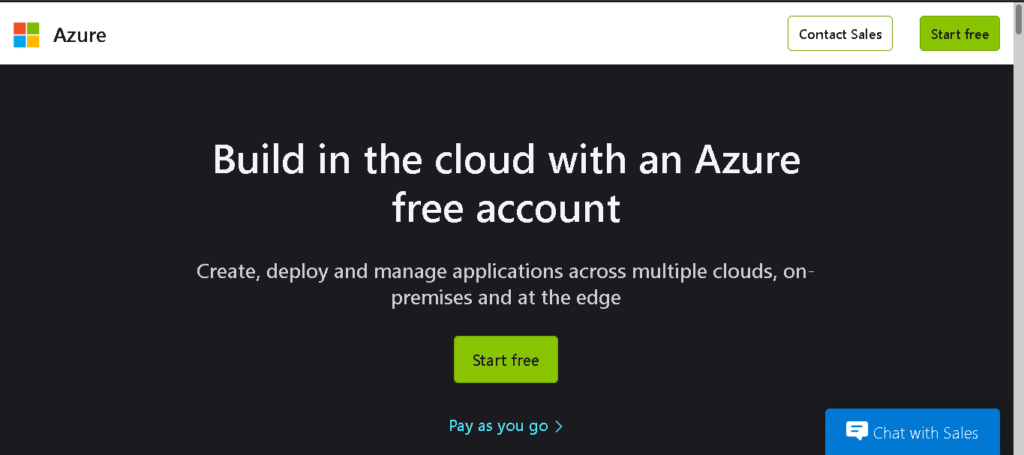
If you have a Microsoft account then you can sign in using that account details on Azure Portal after that you can use the service free for 30 days which will be enough for learning and using blob storage, but if you need to use it for a longer time then you can buy a subscription according to your budget.
Microsoft just charges you according to“pay as you go basics” so whatever subscription you may opt you will be charged according to your uses which means if you don’t use or pause your resource uses you will no longer be charged till you resume it again.
Also if you don’t have a Microsoft account for using azure just go and create one.
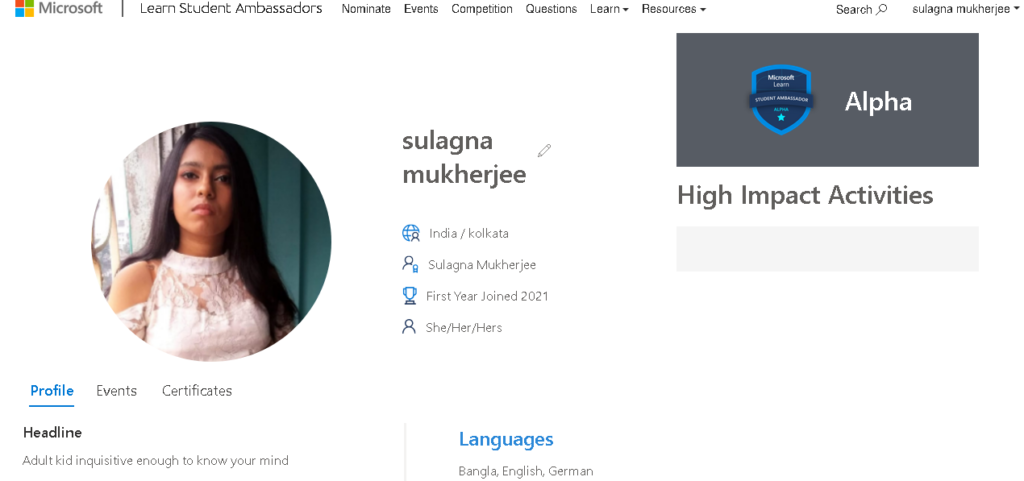
Note: if you are a student you can apply for Microsoft Learn Student Ambassador (I am currently Microsoft Learn Student Ambassador, feel free to contact me for help), where if you get selected then you can use many Microsoft products for free for 1 year with the credits you will be getting each month.
How to Create Blob Storage in Azure?
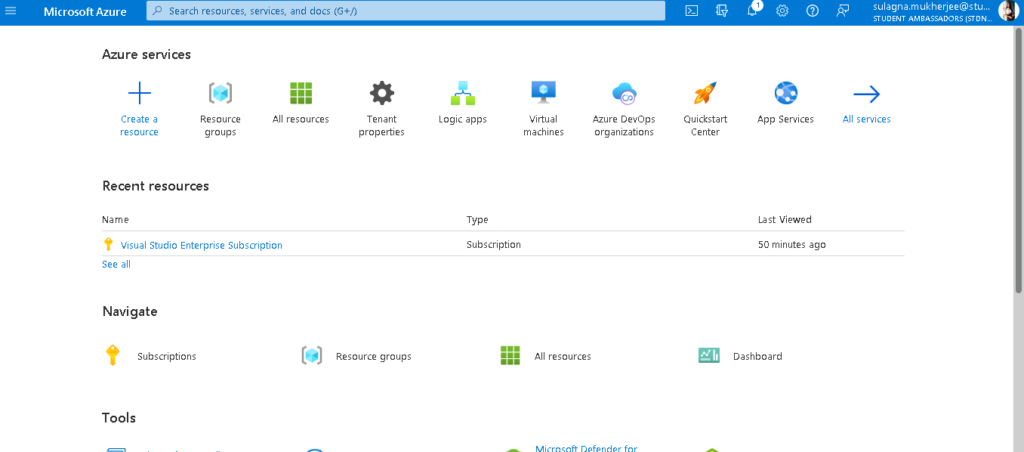
After you are done login into the Azure portal, you have to first create an Azure Storage Account. Steps for creating an Azure storage account are given below:-
- Click the Storage Account option that you will find on the left side top beside the search bar in the azure portal, from that menu bar at the bottom select “Storage Accounts”
- Next, you have to click on “Create Storage Account” at the bottom or you can click the “+ Create” button on the top left of the screen to create a storage account for blob storage.
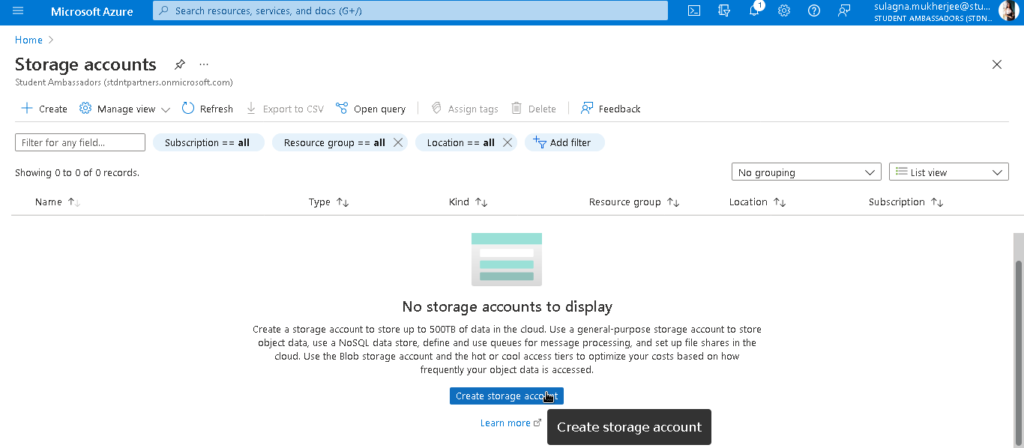
- Next, when you will be taken to the “Create a Storage Account” page you need to add all the required details as mentioned over there. The details are as follows:-
- First, select the subscription and resource group (just create a new resource group if you don’t have an existing one)
- Enter a Storage account name
- Select a region you want
- Keep the performance option as Standard
- Keep the Redundancy value also as it is
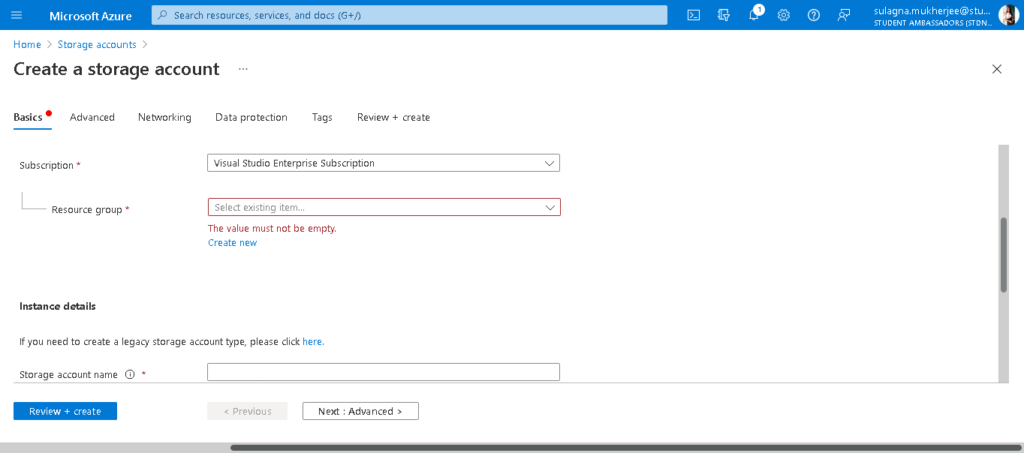
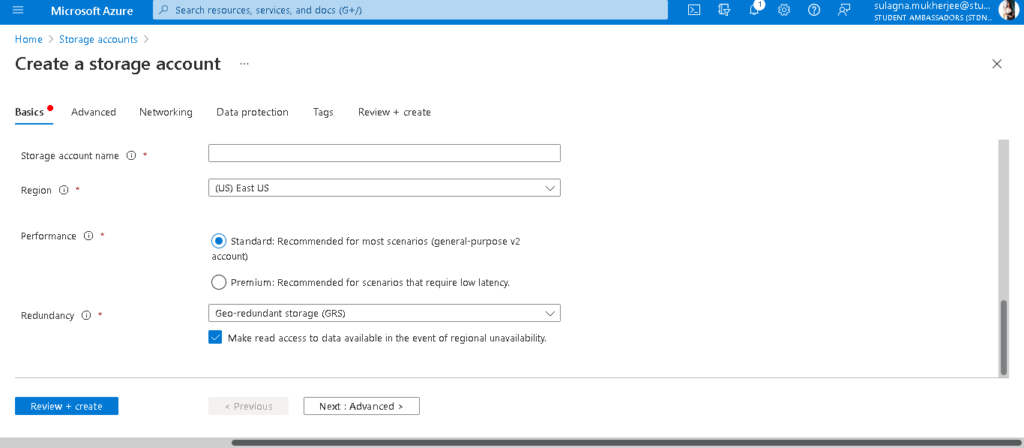
- Once you are done just click “Review + Create” and you will be taken to the review page, where you can recheck every detail you entered on the previous screen and click on “Create”.If you need to change anything, click the Previous button to doing the changes.
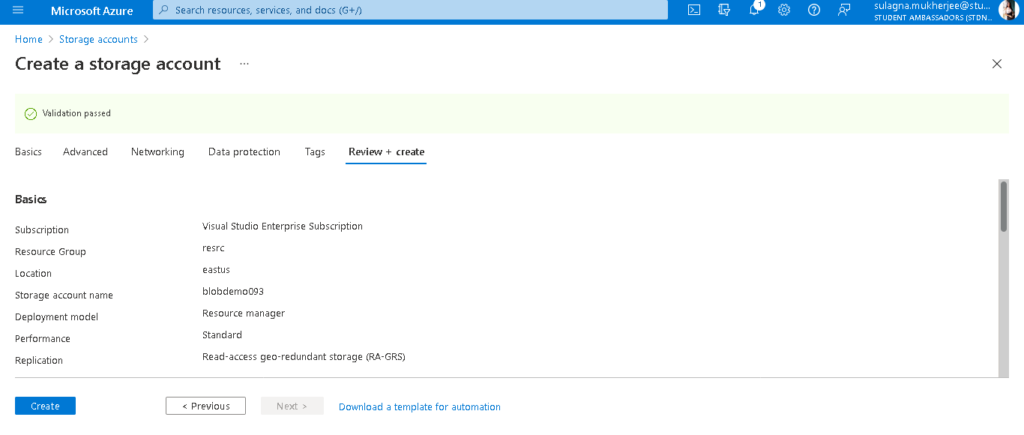
- After that, you will see that the resource group and Azure Blob storage account will be created.
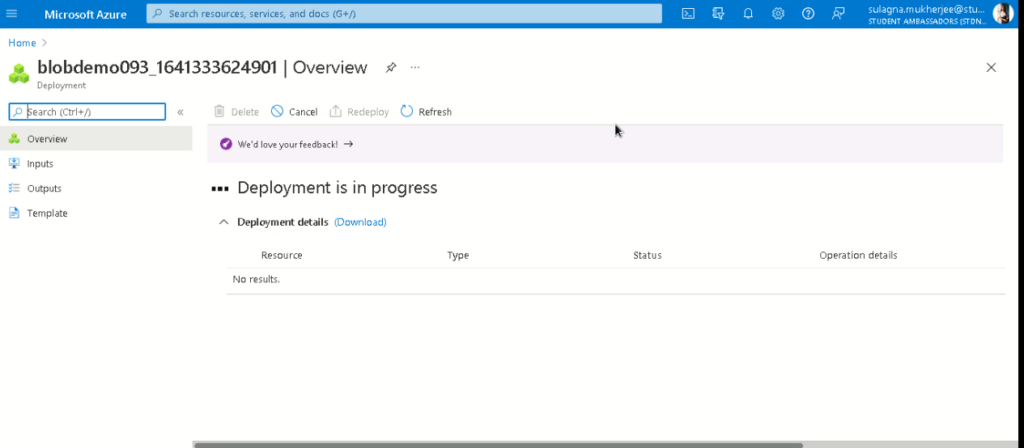
- Next, you have to click on the “Go To Resource” button which will take you to the “Blob Storage Account” you just created
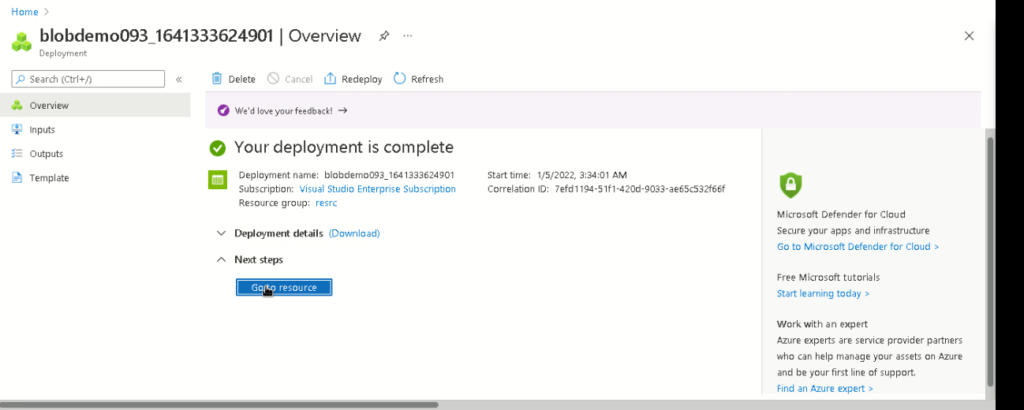
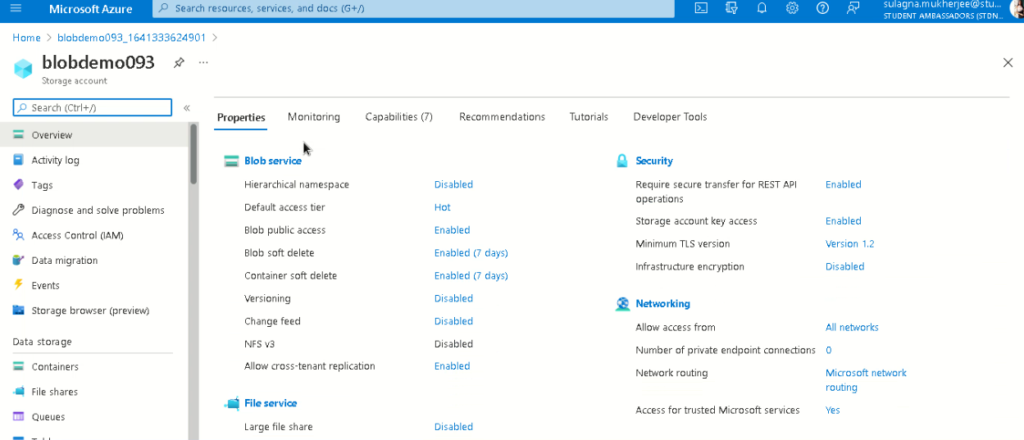
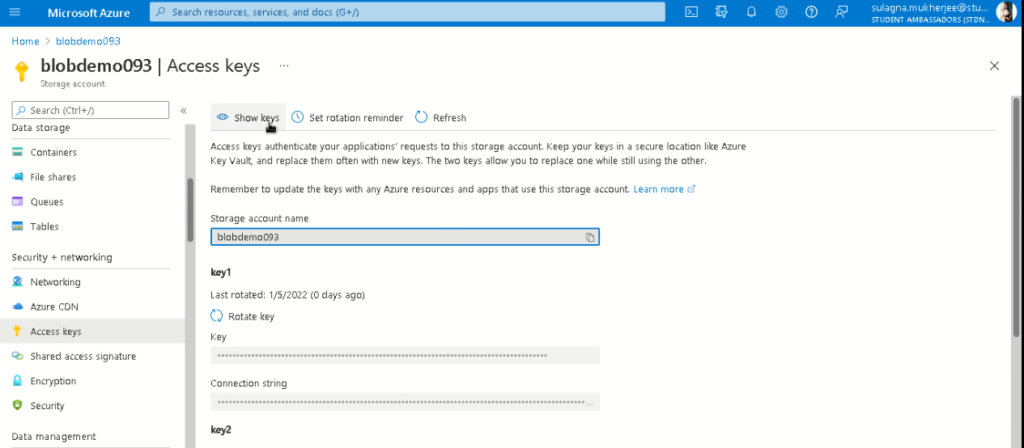
- From the Azure Blob Storage Account, navigate to the left bar and select the “Access Keys” option
- Next click on the option “show Keys” so that you can see the access keys
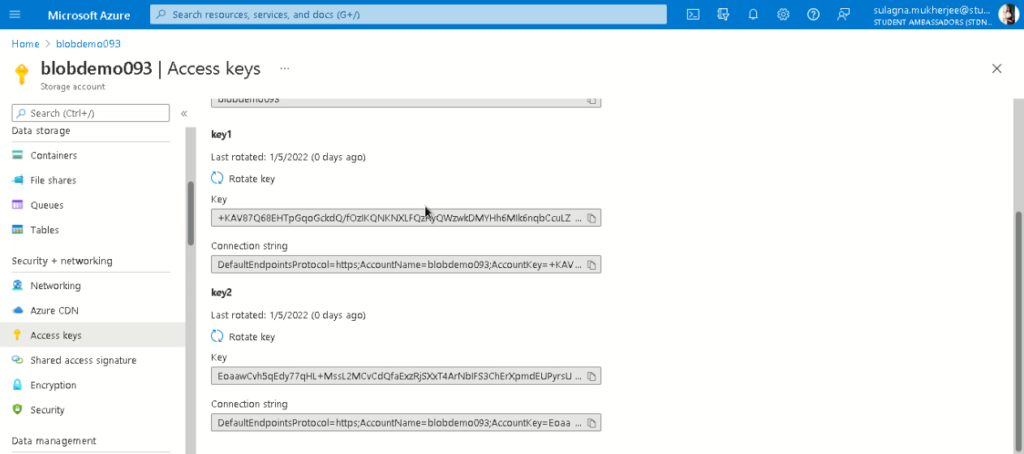
- From here we will get a pair of keys and connection strings where any of these keys can be used in our C# application for storing and downloading files from Blob. You just have to copy the access key and connection string of the account and paste it into your code. For now, copy the access keys to your clipboard
- Next, If you want you can also create a container by navigating to the overview part of your blob storage account, where at the bottom you will find blob service option on properties, Click on it
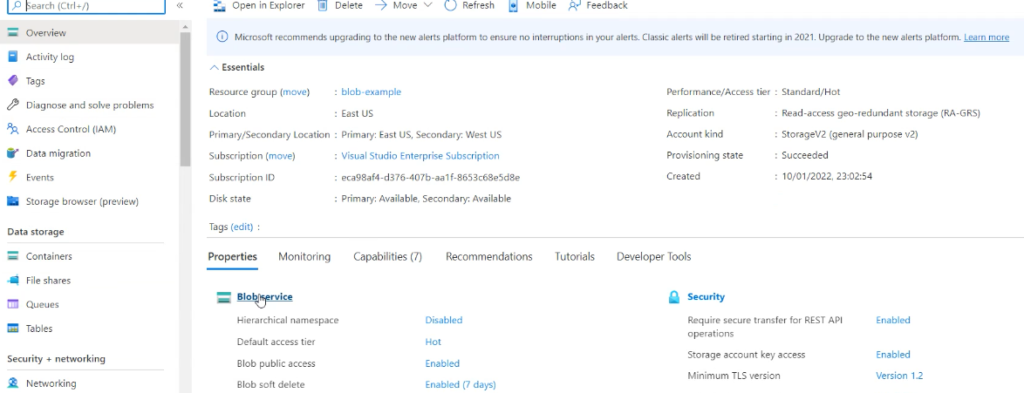
11. After that you will be taken to a new page where you can create a new container by clicking on the “+Container” option

12. Give a name to your container

13. And your new container will get created

Note:- You must maintain the Container names to be in lowercase. For getting more information about naming containers and blobs, check out Naming and Referencing Containers, Blobs, and Metadata.
Build the coding environment and install Nugget packages
Before moving forward to the coding part you need to make a proper coding environment and install some packages. Steps for creating a proper coding environment and installing some packages are given below:-
- Firstly, you have to create a new project in your visual studio(Here Visual Studio 2019 is being used)
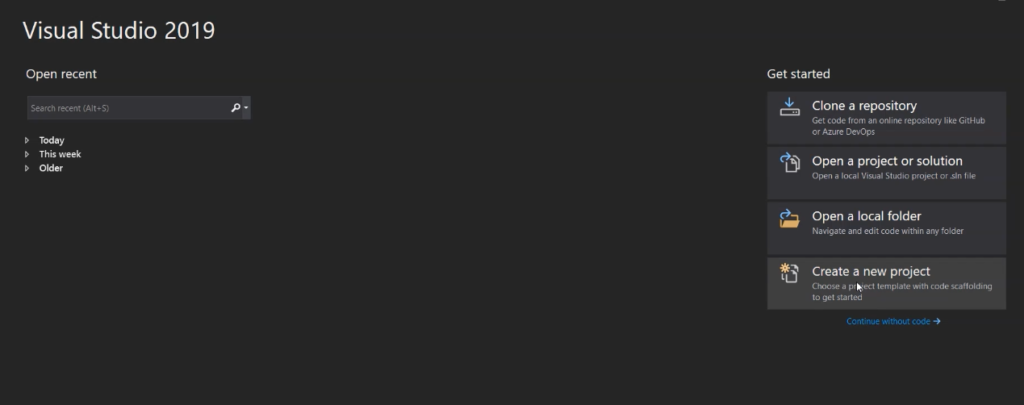
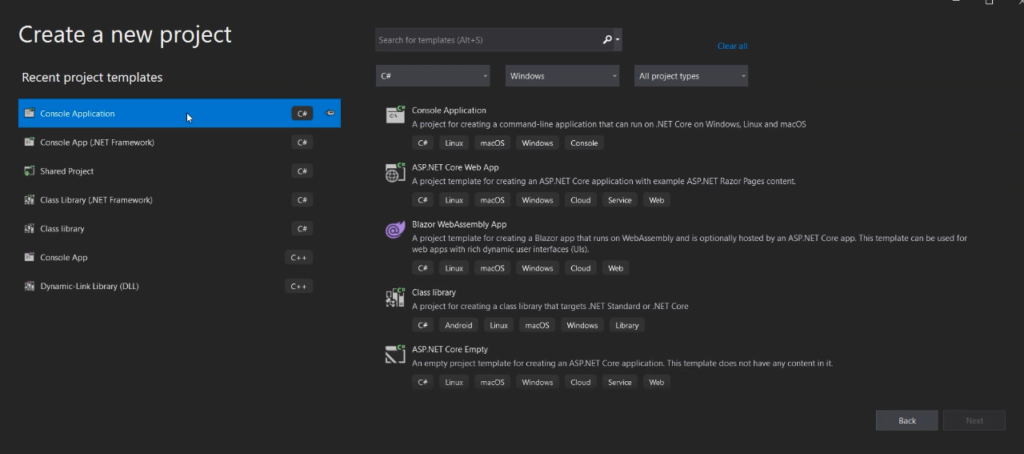
- Next, you have to Click on “Console Application”
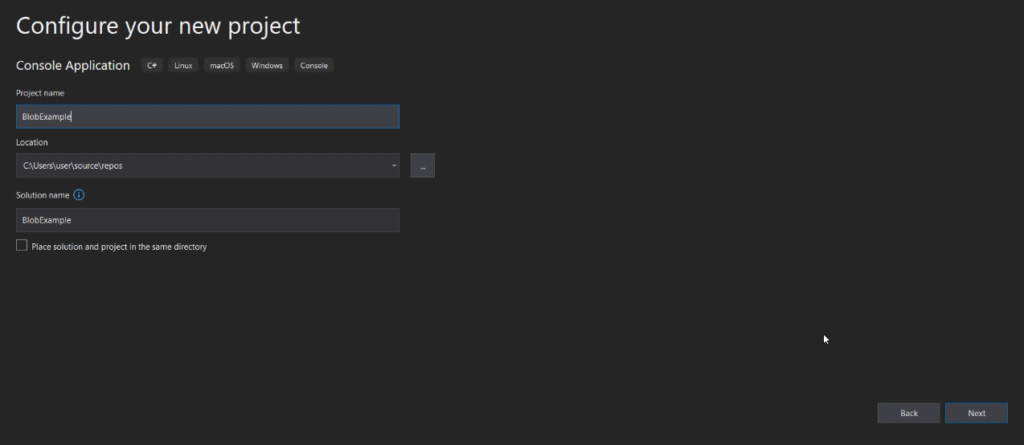
- Now Give a name to your project and click on “Next”
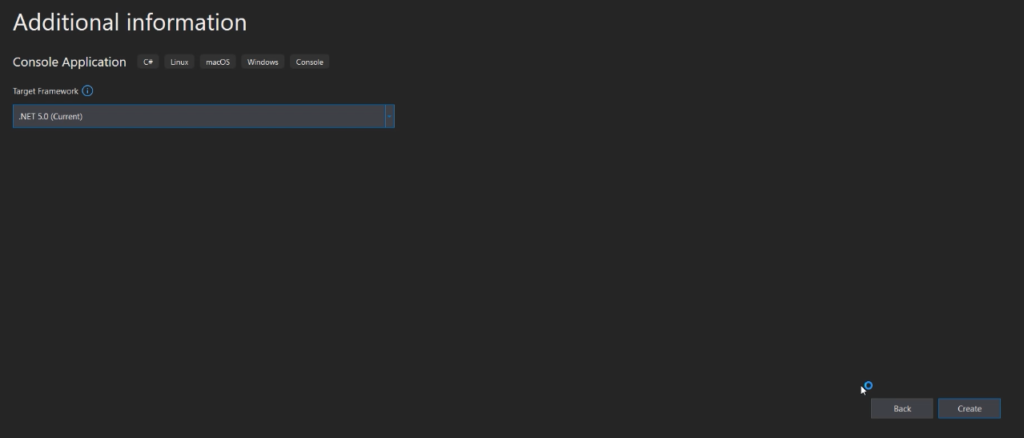
- Now keep the target framework as default and create your project by clicking on ”Create” and your project will get created
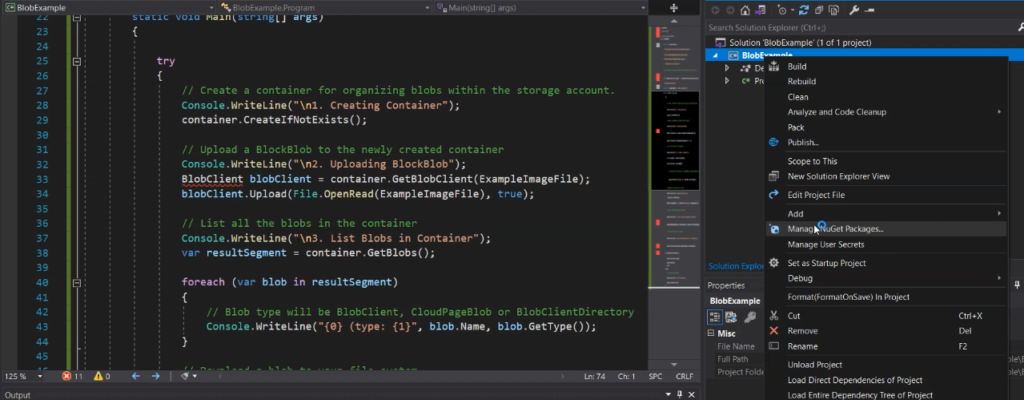
- Once done with creating the project now we have to right-click on the project name and select “Manage Nugget Packages” for installing the required Assembly packages by adding the required Nugget packages,
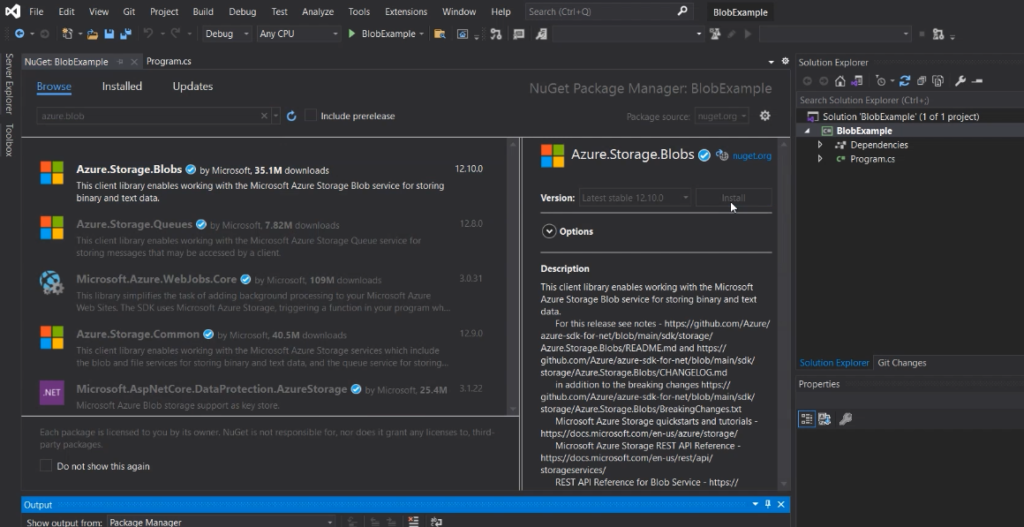
- Next, you have to search for Azure.Storage.Blobs and click on install. Now the packages are installed in your application.
- Next, right click on your project name and select the option “Rebuild” option

- And your project will be rebuilded

Upload file into the blob storage in Azure in C#
Now that we are ready with the coding environment and all other setups, Let us start with the coding part. All the steps for coding will be given below:-
1. Now at first, we have to add the key that we copied to our clipboard ( in Step 2 point 9 ) from our blob storage account to the Program.cs file and By using the following key we can connect to Blob Container Client.
static string connectionString = "DefaultEndpointsProtocol=https;AccountName= your account name ;AccountKey=your account key ;EndpointSuffix=core.windows.net";
        // Get a reference to a container named "sample-container" and then create it
        static BlobContainerClient container = new BlobContainerClient(connectionString, "name of your container ");
Note:- The above Azure Connection string for your project consisting of “AccountName” and “AccountKey” must be fully appropriate to avoid any error.
2. Next, we can do some basic things according to the requirement which is as follows:-
The code for Program.cs is as follows:-
using System;
using System.IO;
using Azure;
using Azure.Storage;
using Azure.Storage.Blobs;
using Azure.Storage.Blobs.Models;
namespace BlobExample
{
    class Program
    {
        static string connectionString = "DefaultEndpointsProtocol=https;AccountName=youraccountname;AccountKey=youraccountkey==;EndpointSuffix=core.windows.net";
        // Get a reference to a container named "sample-container" and then create it
        static BlobContainerClient container = new BlobContainerClient(connectionString, "your container name");
        static string ExampleImageFile = "your file name.jpg";
        static void Main(string[] args)
        {
            try
            {
                // Create a container for organizing blobs within the storage account.
                Console.WriteLine("\n1. Creating Container");
container.CreateIfNotExists();
                // Upload a BlockBlob to the newly created container
                Console.WriteLine("\n2. Uploading BlockBlob");
                BlobClient blobClient = container.GetBlobClient(ExampleImageFile);
                blobClient.Upload(File.OpenRead(ExampleImageFile), true);
                // List all the blobs in the container
                Console.WriteLine("\n3. List Blobs in Container");
                var resultSegment = container.GetBlobs();
                foreach (var blob in resultSegment)
                {
                    // Blob type will be BlobClient, CloudPageBlob or BlobClientDirectory
                    Console.WriteLine("{0} (type: {1}", blob.Name, blob.GetType());
                }
                // Download a blob to your file system
                Console.WriteLine("\n4. Download Blob from {0}", blobClient.Uri.AbsoluteUri);
                blobClient.DownloadTo(string.Format("downloaded_{0}", ExampleImageFile));
                // Create a read-only snapshot of the blob
                Console.WriteLine("\n5. Create a read-only snapshot of the blob");
                var blockBlobSnapshot = blobClient.CreateSnapshot();
                // Delete the blob and its snapshots.
                Console.WriteLine("\n6. Delete block Blob and all of its snapshots");
                blobClient.DeleteIfExists(DeleteSnapshotsOption.IncludeSnapshots);
            }
            catch (RequestFailedException e)
    {
                Console.WriteLine(e.Message);
                Console.ReadLine();
                throw;
            }
            // finally
            {
                // Clean up after the demo.
                // Console.WriteLine("\n7. Delete Container");
                // container.DeleteIfExists();
            }
        }
    }
}
3. Next, you have to run the code.
Note:- Although we are uploading our file in an already existing container that we created earlier i.e “blob-example-container” If you want you can create a totally new container by giving a new name to the container just like in the following code.
// Get a reference to a container named "sample-container" and then create it
        static BlobContainerClient container = new BlobContainerClient(connectionString, "sample-container");
Creating a new container will create a new container and add the file to that particular container only.
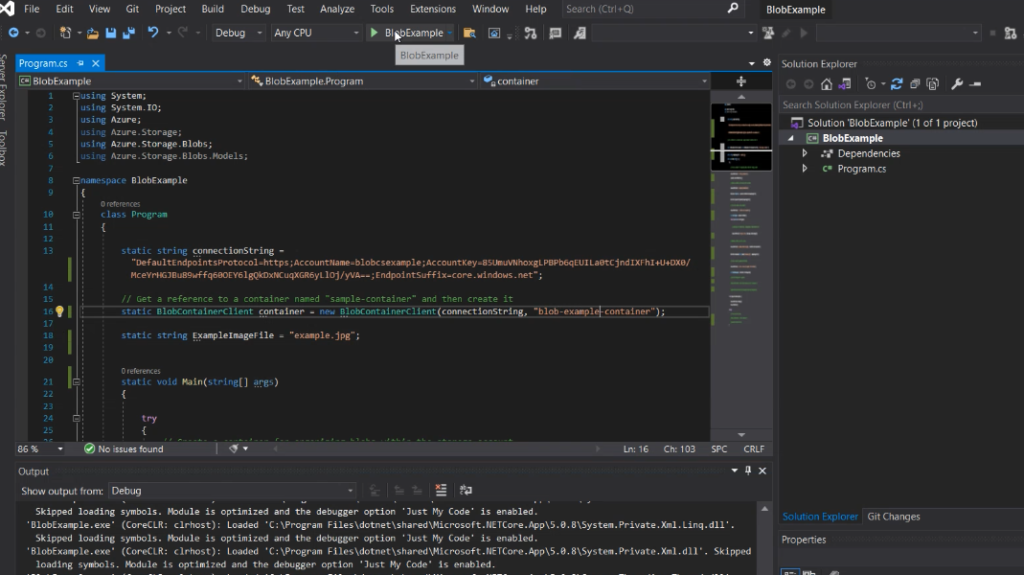
4. The code has been running successfully.
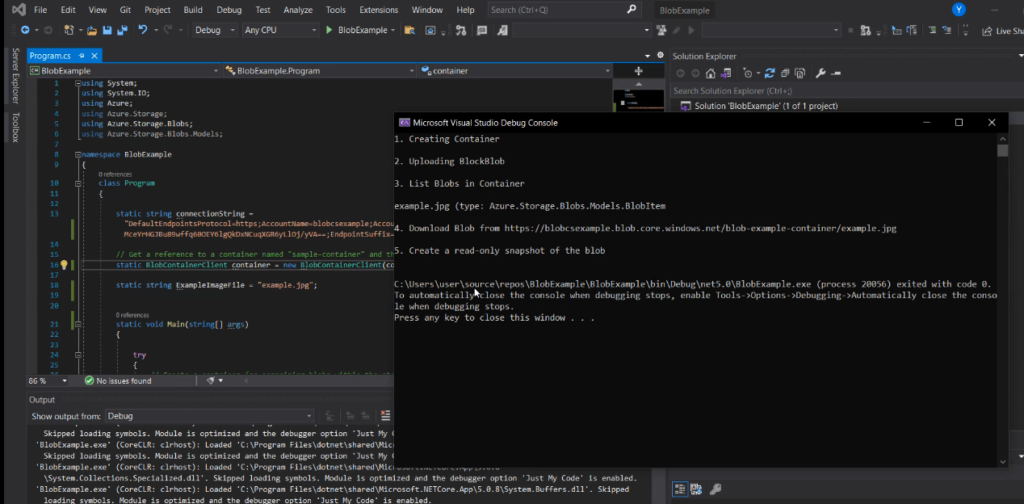
5. Go back to the Azure portal and check the sample container you created, and you will find that the picture that you wanted to add with the help of C# has been added to the blob storage.
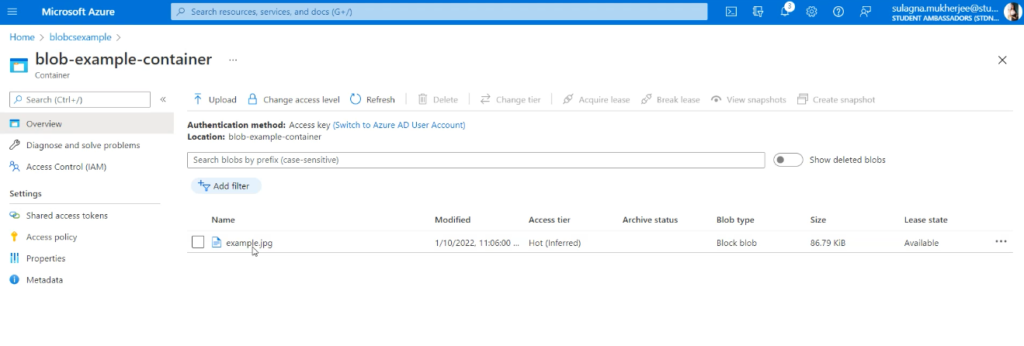
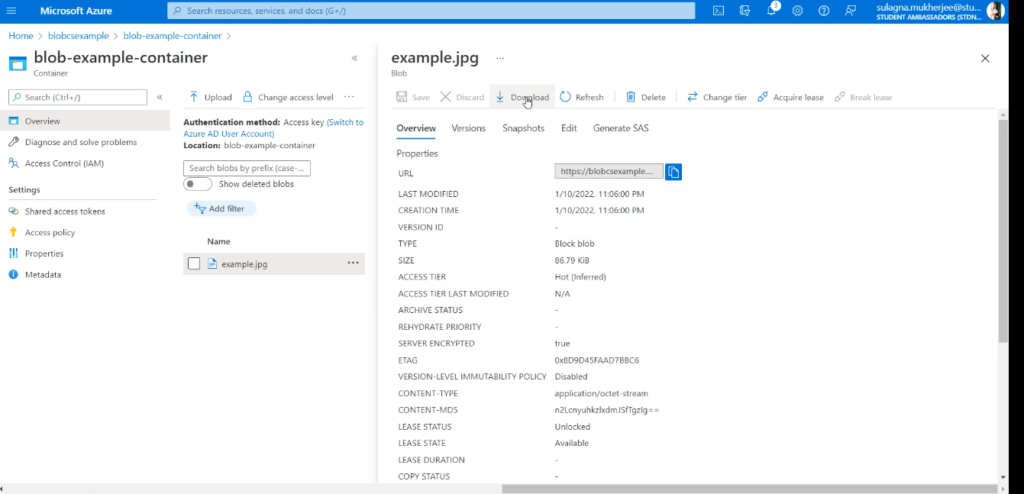
6. Next, Click on the image file you uploaded and download it
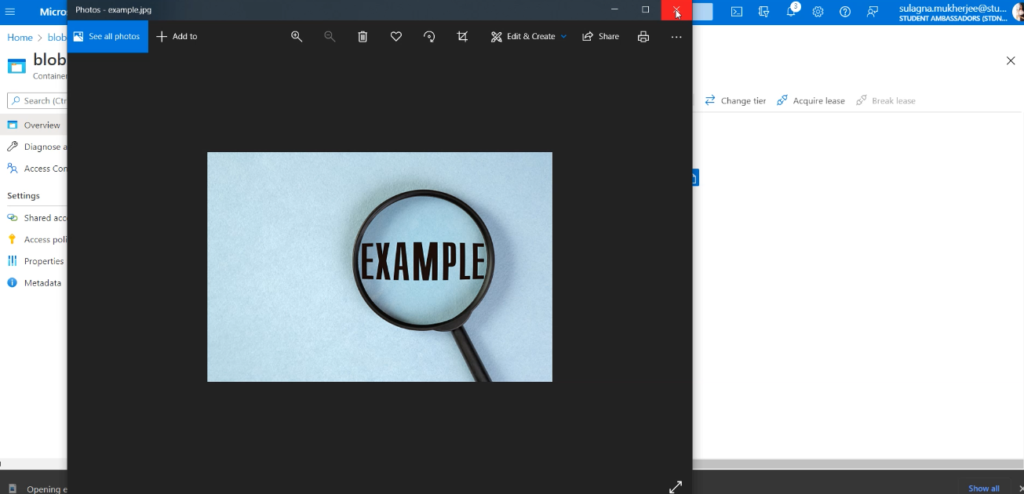
7. And Lastly, You will get the file you uploaded, hence proving you have successfully uploaded the image file by connecting the blob storage in Azure using C#
Delete Azure Blob Storage Container in C#
Remove the container from the azure portal from the C# code
- Lastly, if you want you can use the following function call to remove the container we were using
// Clean up after the demo.
                Console.WriteLine("\n7. Delete Container");
                container.DeleteIfExists();

- Just run the Program.cs code by uncommenting the above code part at the end of the Program.cs code file and you will see that the container has been deleted.
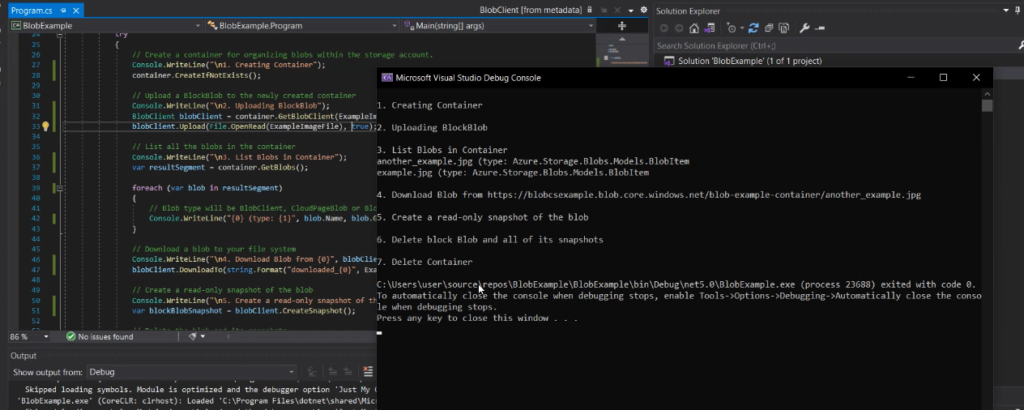
- Go back to the Azure portal and refresh the page where all the containers are there and you will see that the particular container you deleted has been deleted
Before refreshing the page

Delete Container Using DeleteAsync Method
The code given below will clean up the resources the app has created by deleting the entire container with the help of DeleteAsync. The local files created by the apps also get deleted.
The app will get pause and wait for user input by calling Console.ReadLine before deleting the blob, container, and local files. This will help to properly verify whether the resources were actually created correctly or not before they get deleted.
You just need to add this code end of the Main method:
C#
// Clean up
Console.Write("Press any key to begin clean up");
Console.ReadLine();
Console.WriteLine("Deleting blob container...");
await containerClient.DeleteAsync();
Console.WriteLine("Deleting the local source and downloaded files...");
File.Delete(localFilePath);
File.Delete(downloadFilePath);
Console.WriteLine("Done");
Source:- docs.microsoft.com
Read more details at Azure.Storage.Blobs Namespace Reference
Advantages of Using Azure Blob Storage
Azure blob storage is especially used for storing large amounts of binary objects which can be later retrieved but what are the main advantages that make us choose Azure Blob Storage? well, there are many advantages of using Azure Blob Storage. Some of them are as follows:-
- Worldwide access: You can access the data you store in azure blob storage from anywhere in the world with Azure’s regional data centers.
- Availability: Just like other Azure Services, you get a guarantee of 99.9% of service availability for Azure storage accounts from Microsoft Azure.
- Data protection: If you keep your data on azure blob storage, your data remains safe in comparison to keeping it physically at some other place.
- No infrastructure management: You don’t have to worry about different hardware maintenance or upgrades because the whole infrastructure of the cloud is managed by Microsoft.
- Security: Security is a big concern in today’s world that is why data that are stored in blobs are automatically encrypted and protected with AES 256-bit encryption, this AES encryption is extremely secure.
Conclusion
So in this article, we got a basic understanding of blob storage and also how to Connect to blob storage in Azure using C#. We understood how to make blob storage, create the coding environment, how to code in C# to upload a file to Azure blob storage by creating a container, and at last how to delete an entire container with our C# code.
Hope that you have learned something from this article that will help you in the future.








Comments are closed.